

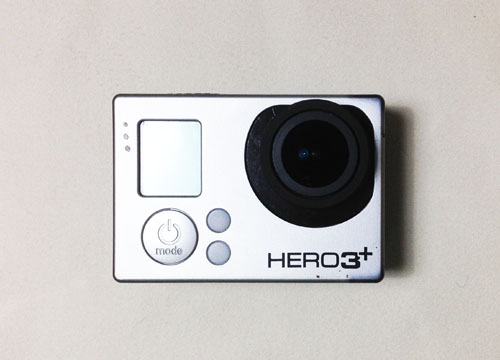
First of all, you may want to clean up the Gopro and remove the memory card, ports cover, back door and the battery. You shall need a mighty wrench, small flat head screw driver and a small flat plastic tools, an air blower, and preferably a micro HDMI cable for live viewing on a big TV.
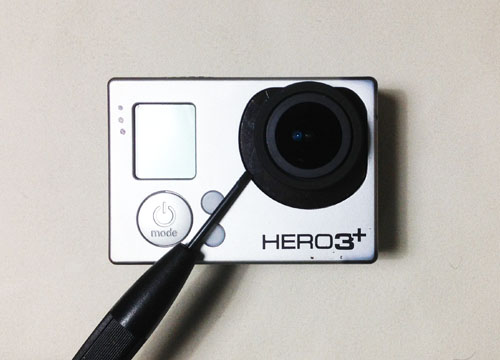
The outer ring was locked with 3 notches at position 000, 120 & 240. Use a small flat head screw driver or a flat plastic piece to unlock the outer ring, it shall jump out when you insert your tool along these 3 positions.
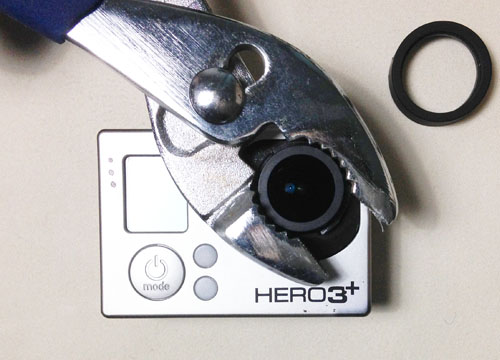
Once the outer ring was removed, the lens is extruding from the top of the metallic base with about 3mm height. Use a wrench to clamp the lens firmly (& gently) to stop it from slipping, and rotate the wrench slowly in counter-clockwise sense while holding the camera with another hand at the same time. If you don't want to leave any teeth mark on the original lens barrel, you can use some electric tapes to wrap the teeth of the wrench around.
For hero3+ black edition the lens was glued slightly at the top of the lens mount with 3 dips of glues. Do not use excessive force, until you hear a crispy cracking sound, the glue break off and you can keep turning the lens slowly. With about 17 complete turns the lens should able to come out of the body.
If you are using hero3 black, you shall need to twist off the lens with more effort as the lens was glued more firmly & fixed with piping tapes. And, the lens is just extruding at 1mm above the metallic base, you shall need to hold the lens with larger force in order to stop it from slipping. It may leave some teeth marks on the lens barrel but it won't affect the image quality if you put it back on later. Although there are many online tutorial saying you may put the gopro in an oven to soften the glue, but we advise never heat up the system when removing the lens or the lens mount may be damaged & hurt the focus with the new lens.
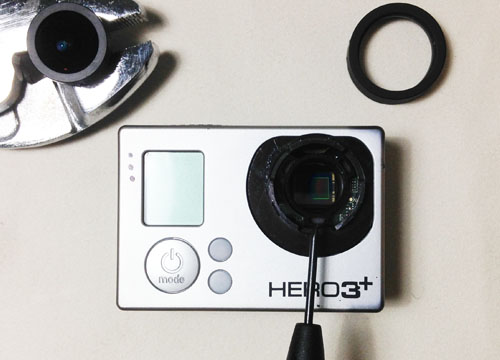
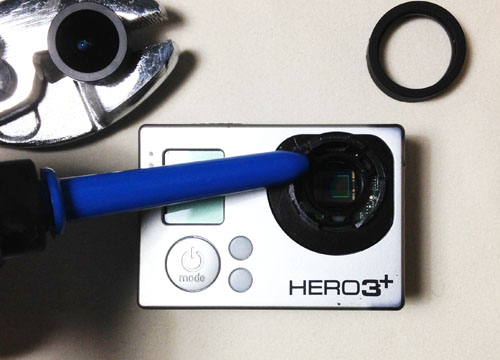
Once the lens was removed, you can see there are three small cups at the top of the lens mount,at position 060, 180 & 300. and there are glues to keep the lens in place. Flip the camera over and remove the residues of the glue carefully without dropping anything to the sensor.
Clean up with air blower to make sure the sensor & the lens mount were free from dirt & dust.
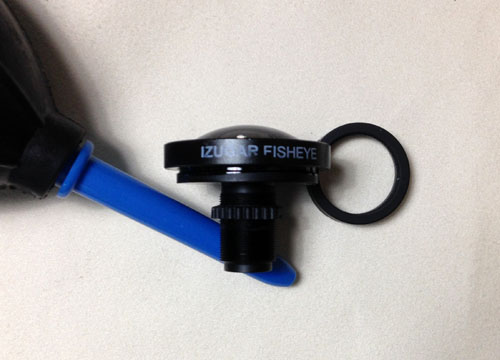
Since the weight of the new lens is much heavier than the original lens, we need extra facilities to keep the lens firmly on the mount. Put the small lens collar on the new lens with the flat end facing the end of the new lens, and set it to around 5mm from the lens base. This small collar is very useful to fix the lens firmly on the lens mount and keep it level to the sensor, which is vital to a clear focus in the later steps.
Some other people like to insert an elastic O-ring to keep the lens level to the sensor. However it's not working with gopro as the working temperature is high and the O-ring shall get partially molten, and may cause focus drifting after taking video for more than 30 minutes.
A note for hero3 black users: hero3 black do not have enough space for manipulating the collar. The original metallic ring on hero 3 black provide better support to the lens.
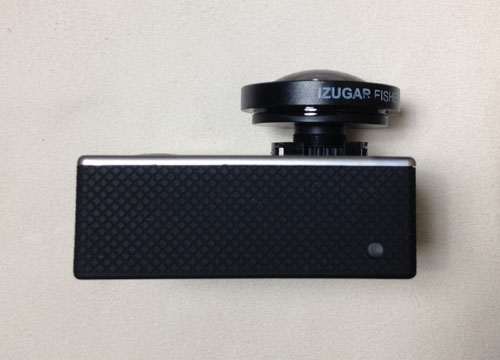
The M12 threads on the plastic lens mount could be damaged easily with a wrong lens insertion. To be save, we twist the lens in counter-clockwise direction until you feel the lens was fitting into the thread, then rotate clockwise slowly. In order to keep the lens level to the sensor, you are advised to flip the camera over, and keep twisting the lens into the mount with the lens facing down. The gravity may attract the lens leaning to the bottom side and make half of the image plane difficult to focus properly.
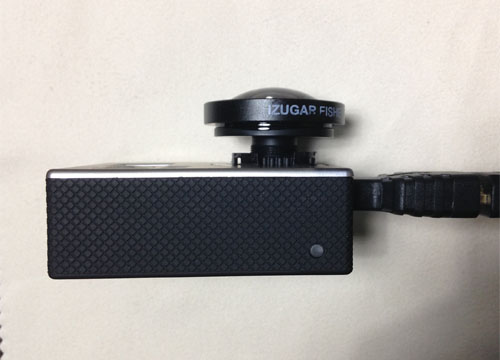
Once the lens collar start to touch the lens mount, plug the micro HDMI cable and monitor the image with a big display. Mirroring the image via iPad app is another option, but the delay may get your work harder. There is a $2 iOS app called Prizmia can offer much responsive feedback.
Once you think the optimal focus was archived, take a snapshot photo to confirm the focus by checking the image at 100% on a computer.
A note for hero3 black users: the structure of the metallic ring around the lens is different to hero 3+, which is a complete longer metallic ring rather than 3 short separated shields as found in hero 3+. In case the optimal focus was still not archived when the lens has fully inserted, you may have to use a file to shorten the metallic ring a little bit. Care must be taken for not dropping anything to the sensor. You can fill lens cave with cotton, set the file on a table, and trim the soft aluminium ring while holding the camera with face-down. Please try to keep the trimming as level as possible. Usually trimming less than 1mm will do, but it varies form camera to camera. Clean up constantly with air blower. When it's done, the lens support of hero 3 shall be better than 3+.
When the calibration is done, hold the lens firmly in position and use a small flat head screw driver to turn the small lens collar to lock the lens against the mount and keep it flat to the sensor. Take another snapshot to confirm the focus when you have set the collar firmly. Redo the process until a sharp image across the whole image plane was obtained. Your new lens has successfully installed on your Gopro.
If you want to use the lens for a long time and not likely to change the lens again, you can add a few dips of epoxy to fix the lens collar in position. You can take it apart anytime by twisting the collar with a strong flat screwer driver.

